


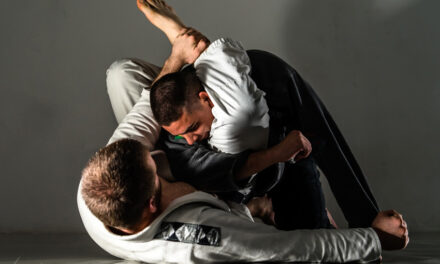
When it comes to Brazilian Jiu-Jitsu, tying your belt may seem like a simple task, but it’s an essential aspect of your gi A properly tied belt not only keeps your gi secure during training but also shows respect for the art and your training partners.
In this step-by-step guide, we’ll cover the correct technique for tying your BJJ belt, ensuring a secure knot every time. So, let’s get started!
Step 1: Start with equal belt lengths
Before attempting to tie your BJJ belt, it’s important to make sure that both ends are of equal length. This ensures that you begin the tying process on a level playing field, and that your belt will be properly secured throughout your training.
To do this, hold both ends of the belt in your hands. Each end should be of equal length. Take the time to adjust them if they are not.
Once both ends are the same length, move on to the next step of tying your BJJ belt.
Step 2: Wrap the belt around your waist
Once you have ensured that both ends of your belt are even, it’s time to wrap it around your waist. Begin by placing the middle of the belt on your belly button.
Take the ends of the belt and bring them behind your back, crossing them over each other. The end on your right should be on top of the end on your left side.
Bring the ends back to the front of your waist, ensuring they are still even. Tuck the top end under both layers of the belt before tying the knot. This will help make the knot more secure during training.
Step 3: Tighten and Secure the Knot
Now that the belt is wrapped around your waist and the ends are even, it’s time to tighten and secure the knot. The goal is to create a knot that stays in place during training, but is also easy to untie when needed.
Begin by pulling both ends of the belt evenly to tighten it around your waist. Make sure the belt feels snug, but not too tight that it restricts movement or breathing.
Next, cross the right end of the belt over the left end and tuck it underneath the left layer. Hold onto both ends of the belt and pull them tight to create a knot. The knot should rest on top of your waist, with the belt ends hanging down evenly on both sides.
To create a more professional-looking knot, adjust the ends of the belt by pulling them outwards and upwards. This will help to create a crease in the belt and make the knot appear more symmetrical.
Remember to double-check that the knot is secure before starting your training. If the belt feels loose or starts to come undone during training, it could be distracting or even dangerous.
FAQ: Common questions about tying BJJ belts
Here are some answers to common questions about tying your BJJ belt:
How tight should the belt be?
The belt should be snug and secure around your waist, but not too tight that it restricts your breathing or movement. It should be comfortable enough to wear during training sessions.
How long should the belt ends be?
The belt ends should be long enough to tie a knot, but not so long that they touch the ground or get in the way during training. A good rule of thumb is to have the ends hang down to your mid-thighs.
How often should I retie my belt?
You should retie your belt before every training session. This ensures that the knot is secure and the belt is properly positioned for maximum effectiveness during training.
What if my belt comes undone or becomes too loose during training?
If your belt comes undone during training, simply stop and tie it again. It’s important to make sure the knot is secure before continuing to train. If your belt becomes too loose during training, you can adjust it by pulling the ends tighter and retying the knot.
By following these tips and practicing the proper technique, you can ensure that your BJJ belt stays secure and comfortable during training sessions.


